PotD 181-190
Don’t forget to use a pomander of raising at the start of the set. More cannot be found here, unfortunately.
This is the scariest set in terms of the regular floors. 87-89 have absolutely terrible mobs that you mostly won’t want to fight solo. 86 can be bad too, but is a bit more random in the enemies you’ll see. The usual plan is to get as far as you can with minimal pomander usage, and then use what you need to get through the last few floors.
- Alterations are great here - if you get mandragoras, great! If you get mimics, they’re still much better than most of the other enemies.
- Rage is great, and there are a couple optimal ways to use it
- Use fortune and clear the entire floor (or as much as possible), then go back to collect your loot. Even better if you planned ahead and used affluence as well.
- Double-rage - collect as many chests as you can and locate the exit before-hand, then use rage, clear enemies close to the exit as quickly as possible and go into the portal with rage still active. You can then continue killing a few enemies on the next floor before it wears off.
- Flights are not great here as they don’t combine well with alteration, and don’t save you much time with rage either since the enemies are more spread out. Flight will save more time on the earlier floors that you’re going to fight through if you need it.
Be aware of the wall traps on these floors.
Enemy Details
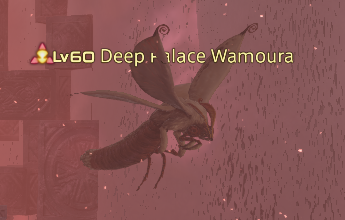


Deep Palace Wamoura
| Ability | Potency | Effect |
|---|---|---|
| Poison Dust |
|
telegraphed conal AoE; inflicts poison |
|
Exuviation
|
n/a | heals another enemy. If you pull multiple mobs, kill the Wamoura first. If you pull 2 Wamouras, you'll probably have to use Witching or Rage to avoid them healing each other forever |
Deep Palace Grenade (Bomb)
| Ability | Potency | Effect |
|---|---|---|
| Hypothermal Combustion |
|
telegraphed pointblank AoE; inflicts frostbite (magic DoT potency 100, 21s) |
Deep Palace Sprite
Notes
- Caster - kiting doesn't help to mitigate damage
- Interrupts spell casts very often
- Can only be slowed with Arm's Length if transfigured via Pomander of Witching since it doesn't normally do melee auto-attacks
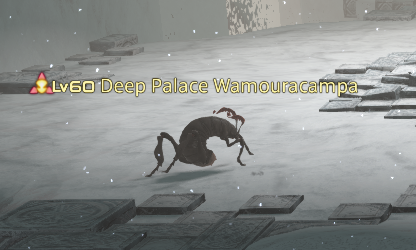
Deep Palace Wamouracampa
| Ability | Potency | Effect |
|---|---|---|
| Cannonball |
|
instant ranged attack on random player |
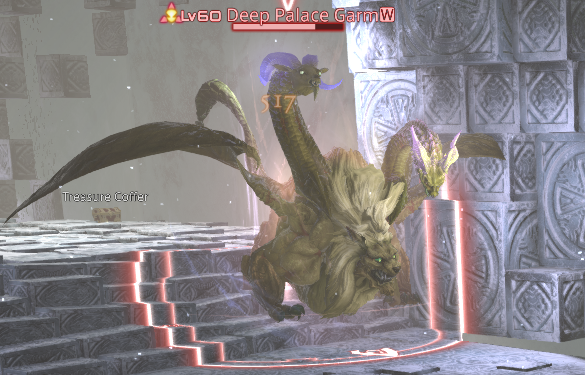
Deep Palace Garm (Chimera)
| Ability | Potency | Effect |
|---|---|---|
|
The Dragon's Voice
|
600? | untelegraphed donut AoE - get IN. Inflicts electrocution (DoT potency 50, 30s) and paralysis (30s). Can be interrupted |
|
The Ram's Voice
|
600? | untelegraphed pointblank AoE - get OUT. Inflicts frostbite and deep freeze. Can be interrupted |
| The Dragon's Breath |
|
telegraphed conal AoE |
| The Lion's Breath |
|
telegraphed conal AoE |
| The Ram's Breath |
|
telegraphed conal AoE |
Notes
- These mostly just spam abilities, doing very little auto-attack damage
- Try to stand behind it during Voice and Breath attacks to delay its next auto-attack
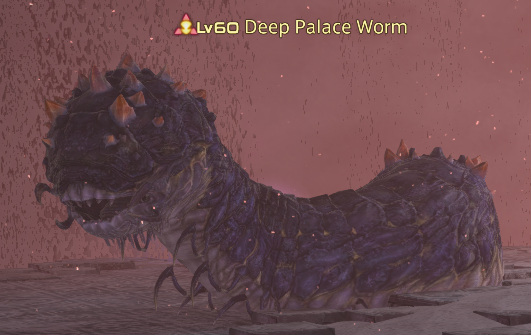
Deep Palace Worm
| Ability | Potency | Effect |
|---|---|---|
|
Sand Pillar
|
|
instant circle AoE on random player. Also used out of combat, with potency 75; be very careful if there are several worms nearby, as getting hit by a few of these at once could kill you |
|
Bottomless Desert
|
20 | quick huge pointblank AoE; draws players in. Knockback immunity does not work, but draw-in will not work on floors with knockback penalty |
|
Tremblor
|
350 | instant pointblank AoE; used immediately after Bottomless Desert |
Notes
- Enrages after 30 seconds, using Bottomless Desert followed by Tremblor. Knockback penalty blocks the draw-in, making them easier to deal with
- Can appear on any floor from 181-189, but seems fairly rare in the earlier floors, and more common in the later floors
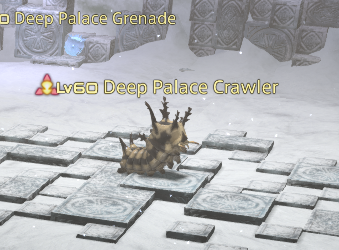
Deep Palace Crawler
| Ability | Potency | Effect |
|---|---|---|
| Sticky Thread |
|
instant conal AoE; inflicts slow (30s) |
| Poison Breath | n/a | instant conal AoE on random player; inflicts poison (magic DoT potency 60, 20s) |
Deep Palace Vindthurs (Ogre)
| Ability | Potency | Effect |
|---|---|---|
| Freezeover | ? | telegraphed circle AoE on random player |
| Plain Pound | ? | telegraphed pointblank AoE |
Deep Palace Archaeosaur
| Ability | Potency | Effect |
|---|---|---|
| Underbite |
|
instant |
| Primordial Bark | ? | telegraphed pointblank AoE |
Deep Palace Claw (Scorpion)
| Ability | Potency | Effect |
|---|---|---|
|
Inspire
|
n/a | instant on random player; draws the target in and inflicts prey. Knockback immunity does not work against the draw-in |
| Impale |
|
used against players with prey; clears prey status |
| Tail Screw |
|
untelegraphed pointblank AoE on random player; inflicts slow (20s) |
Notes
- Does a draw-in that inflicts Prey status followed by Impale. Knockback immunity does not work, but draw-in will not work on floors with knockback penalty, making them easier to deal with
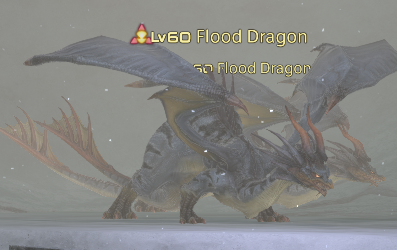
Flood Dragon
| Ability | Potency | Effect |
|---|---|---|
| Sheet of Ice |
|
instant circle AoE on random player; inflicts frostbite (magic DoT potency 100, 21s) |
| Granite Rain | ? | telegraphed pointblank AoE |
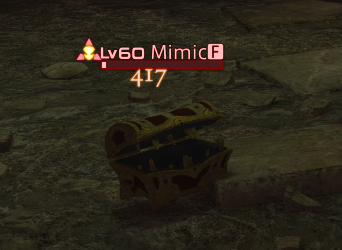
Mimic
| Ability | Potency | Effect |
|---|---|---|
| Infatuation | n/a | inflicts pox (magic DoT potency 5, 10m); can be interrupted |
| Deathtrap |
|
telegraphed pointblank AoE |
Notes
- Sometimes found in gold chests
- Pomander of Alteration transforms all enemies in a random room on the next floor into either mimics or mandragoras
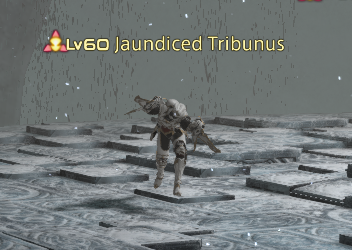
Jaundiced Tribunus (Fallen NPC)
Notes
- Rare spawn
- Uses only auto-attacks
- Immune to transfiguration (Pomander of Witching)
- Dies in 4 hits from resolution
- Dying words: Lord Gaius... I'm coming.
Job-Specific Notes:
Difficulty: Unrated
Difficulty: Unrated
Difficulty: Unrated
Difficulty: Unrated
Difficulty: Unrated
Difficulty: Unrated
Difficulty: Easy
Difficulty: Easy
Difficulty: Unrated
Difficulty: Unrated
Difficulty: Unrated
Difficulty: Easy
Difficulty: Easy
Difficulty: Easy
Difficulty: Unrated
Difficulty: Unrated
Difficulty: Easy
Difficulty: Easy
Difficulty: Unrated
Difficulty: Easy
Difficulty: Unrated
Difficulty: Unrated
Difficulty: Unrated
Difficulty: Unrated
Difficulty: Unrated
Difficulty: Unrated
Difficulty: Unrated
Difficulty: Easy
Difficulty: Easy
Difficulty: Unrated
Difficulty: Unrated
Difficulty: Unrated
Difficulty: Easy
- Can stun Hypothermal Combustion for uptime
Difficulty: Easy
Difficulty: Easy
Difficulty: Unrated
Difficulty: Unrated
Difficulty: Easy
Difficulty: Easy
Difficulty: Unrated
Difficulty: Easy
Difficulty: Unrated
Difficulty: Unrated
Difficulty: Unrated
Difficulty: Unrated
Difficulty: Unrated
Difficulty: Unrated
Difficulty: Unrated
Difficulty: Easy
Difficulty: Hard
- Steel recommended
- Can bind and retreat out of casting range for some recovery time
Difficulty: Unrated
Difficulty: Unrated
Difficulty: Unrated
Difficulty: Easy
Difficulty: Medium
Difficulty: Medium
- Doable without steel, with bloodbath/stun/potion
Difficulty: Unrated
Difficulty: Unrated
Difficulty: Medium
- Slow to fight because of cast interrupts
Difficulty: Hard
- Steel recommended
- Use Addle to reduce damage
Difficulty: Unrated
Difficulty: Easy
Difficulty: Unrated
Difficulty: Unrated
Difficulty: Unrated
Difficulty: Unrated
Difficulty: Unrated
Difficulty: Unrated
Difficulty: Unrated
Difficulty: Easy
Difficulty: Medium
- Can be painful. Sprint and Leg Graze recommended
Difficulty: Unrated
Difficulty: Unrated
Difficulty: Unrated
Difficulty: Easy
Difficulty: Hard
Difficulty: Medium
- Doable without steel, use bloodbath and stun when at low HP
Difficulty: Unrated
Difficulty: Unrated
Difficulty: Medium
- Dangerous without steel. Kite to reduce damage
Difficulty: Medium
- Pre-pull Sprint, shield, and full burst recommended
Difficulty: Unrated
Difficulty: Easy
Difficulty: Unrated
Difficulty: Unrated
Difficulty: Unrated
Difficulty: Unrated
Difficulty: Unrated
Difficulty: Unrated
Difficulty: Unrated
Difficulty: Easy
- Can interrupt Ram's Voice for uptime
Difficulty: Easy
- Try to always stay at a medium range, so it's easy to move in or out when necessary. A bit of range will help to avoid some auto-attacks too
- Can interrupt a Voice if you need to, but save for emergencies (avoiding another patrol, etc.)
Difficulty: Unrated
Difficulty: Unrated
Difficulty: Unrated
Difficulty: Easy
- Can interrupt Ram's Voice for uptime
Difficulty: Easy
Difficulty: Easy
- Can use Hell's Egress to dodge Ram's Voice
Difficulty: Unrated
Difficulty: Unrated
Difficulty: Easy
Difficulty: Easy
- Steel recommended in Gloom or HP Penalty enchantments
Difficulty: Unrated
Difficulty: Easy
- Can interrupt Ram's Voice for uptime
Difficulty: Unrated
Difficulty: Unrated
Difficulty: Unrated
Difficulty: Unrated
Difficulty: Unrated
Difficulty: Unrated
Difficulty: Unrated
Difficulty: Hard - 'Can probably stun after the draw-in and run out of AoE range (?); otherwise, keep your HP up and use mitigation and the damage isn''t too bad'
Difficulty: Hard
- Avoid if possible
Difficulty: Unrated
Difficulty: Unrated
Difficulty: Unrated
Difficulty: Hard
- Strength or steel recommended
- Can probably stun after the draw-in and run out of AoE range (?); otherwise, keep your HP up and use mitigation and the damage isn't too bad
Difficulty: Hard
- Steel required
- Strength recommended
Difficulty: Hard
- Avoid if possible
- Strength or steel required
Difficulty: Unrated
Difficulty: Unrated
Difficulty: Hard
- Avoid if possible
- Steel required
- Shield needed to survive Tremblor crit + followup auto
Difficulty: Hard
- Try to avoid, but can burst down if necessary
- Steel required in Gloom or HP Penalty enchantments
Difficulty: Unrated
Difficulty: Unrated
Difficulty: Unrated
Difficulty: Unrated
Difficulty: Unrated
Difficulty: Unrated
Difficulty: Unrated
Difficulty: Unrated
Difficulty: Unrated
Difficulty: Medium
- Slow and annoying to fight due to slow
Difficulty: Hard
- Avoid if possible
Difficulty: Unrated
Difficulty: Unrated
Difficulty: Unrated
Difficulty: Unrated
Difficulty: Extreme
- Witching recommended
Difficulty: Hard
- Avoid if possible
- Strength or steel required
Difficulty: Unrated
Difficulty: Unrated
Difficulty: Hard
- Avoid if possible
- Steel recommended. Can be fought without steel, but very slow
Difficulty: Extreme
- Avoid if possible
- Witching required
Difficulty: Unrated
Difficulty: Unrated
Difficulty: Unrated
Difficulty: Unrated
Difficulty: Unrated
Difficulty: Unrated
Difficulty: Unrated
Difficulty: Unrated
Difficulty: Unrated
Difficulty: Easy
Difficulty: Easy
Difficulty: Unrated
Difficulty: Unrated
Difficulty: Unrated
Difficulty: Easy
Difficulty: Easy
Difficulty: Easy
Difficulty: Unrated
Difficulty: Unrated
Difficulty: Easy
Difficulty: Easy
Difficulty: Unrated
Difficulty: Easy
Difficulty: Unrated
Difficulty: Unrated
Difficulty: Unrated
Difficulty: Unrated
Difficulty: Unrated
Difficulty: Unrated
Difficulty: Unrated
Difficulty: Easy
Difficulty: Medium
- Can be painful. Sprint and Leg Graze recommended
Difficulty: Unrated
Difficulty: Unrated
Difficulty: Unrated
Difficulty: Medium
- Can stun Primordial Bark for uptime
Difficulty: Hard
- Strength and/or steel recommended
Difficulty: Medium
- Steel or Bloodbath and potion required
Difficulty: Unrated
Difficulty: Unrated
Difficulty: Medium
- Dangerous without steel. Kite to reduce damage
Difficulty: Medium
- Steel recommended any time, but required in Gloom or HP Penalty enchantments
Difficulty: Unrated
Difficulty: Easy
Difficulty: Unrated
Difficulty: Unrated
Difficulty: Unrated
Difficulty: Unrated
Difficulty: Unrated
Difficulty: Unrated
Difficulty: Unrated
Difficulty: Medium
- Stun Tail Screw
- Slower and more difficult to fight with amnesia enchantment due to the slow
Difficulty: Hard
- Steel required unless floor has no knockback debuff
Difficulty: Unrated
Difficulty: Unrated
Difficulty: Unrated
Difficulty: Medium
- Stun Tail Screw
- Slower and more difficult to fight with amnesia enchantment due to the slow
Difficulty: Extreme
- Steel required
Difficulty: Hard
- Avoid if possible
- Steel required
- Stun Tail Screw
Difficulty: Unrated
Difficulty: Unrated
Difficulty: Medium
- Dangerous without steel. Kite between draw-ins to avoid taking an auto-attack with Tail Screw
Difficulty: Hard
- Avoid if possible
- Steel required
- Strength recommended
- Possible with full burst, Sprint, shield, steel, and potion, but still risky
Difficulty: Unrated
Difficulty: Easy
- Stun Tail Screw
- Slower and more difficult to fight with amnesia enchantment due to the slow
Difficulty: Unrated
Difficulty: Unrated
Difficulty: Unrated
Difficulty: Unrated
Difficulty: Unrated
Difficulty: Unrated
Difficulty: Unrated
Difficulty: Extreme
- Avoid
- Probably need at least steel if you have to fight
Difficulty: Extreme
- Worst thing you can fight. Avoid
Difficulty: Unrated
Difficulty: Unrated
Difficulty: Unrated
Difficulty: Extreme
- Avoid
- Probably need at least steel if you have to fight
Difficulty: Extreme
- Strength AND steel recommended
Difficulty: Extreme
- Avoid if possible
- Strength and steel required
- Have Bloodbath and potion ready too if you need to fight one
- Witching recommended
Difficulty: Unrated
Difficulty: Unrated
Difficulty: Hard
- Steel required
- Remove the DoT with Esuna as soon as it's inflicted
Difficulty: Extreme
- Avoid
- Witching required
Difficulty: Unrated
Difficulty: Unrated
Difficulty: Unrated
Difficulty: Unrated
Difficulty: Unrated
Difficulty: Unrated
Difficulty: Unrated
Difficulty: Unrated
Difficulty: Unrated
Difficulty: Medium
Difficulty: Medium
- Crits can be scary, especially under gloom or HP penalty
- Still better than a lot of the other things you can fight on this set
Difficulty: Unrated
Difficulty: Unrated
Difficulty: Unrated
Difficulty: Medium
Difficulty: Hard
- Steel recommended
Difficulty: Hard
- Strength or steel required
- Witching recommended if no steel
- Kite after the Pox and Deathtrap combo to manage incoming damage
Difficulty: Unrated
Difficulty: Unrated
Difficulty: Medium
- Dangerous without steel. Kite to reduce damage
Difficulty: Hard
- Steel required
- Strength recommended
Difficulty: Unrated
Difficulty: Medium
Difficulty: Unrated
Difficulty: Unrated
Difficulty: Unrated
Difficulty: Unrated
Difficulty: Unrated
Difficulty: Unrated
Difficulty: Unrated
Difficulty: Unrated
Difficulty: Hard
Difficulty: Unrated
Difficulty: Unrated
Difficulty: Unrated
Difficulty: Unrated
Difficulty: Extreme
- Steel required
- Strength recommended
Difficulty: Unrated
Difficulty: Unrated
Difficulty: Unrated
Difficulty: Hard
- Steel recommended
- Requires very good kiting to fight without steel
Difficulty: Unrated
Difficulty: Unrated
Difficulty: Unrated
Difficulty: Unrated
Enemies
| 1 | 2 | 3 | 4 | 5 | 6 | 7 | 8 | 9 | ! | Name | Warnings | AST | BLM | BRD | DNC | DRG | DRK | GNB | MCH | MNK | NIN | PCT | PLD | RDM | RPR | SAM | SCH | SGE | SMN | VPR | WAR | WHM | HP | AA | Vulnerabilities | |||||
|---|---|---|---|---|---|---|---|---|---|---|---|---|---|---|---|---|---|---|---|---|---|---|---|---|---|---|---|---|---|---|---|---|---|---|---|---|---|---|---|---|
|
|
|
|
|
Deep Palace Wamoura |
|
? | ? | ? | ? | ? | ? | Easy | Easy | ? | ? | ? | Easy | Easy | Easy | ? | ? | Easy | Easy | ? | Easy | ? | 26K | 2458 |
|
|
|
|
|
|
||||||
|
|
Deep Palace Grenade (Bomb) | ? | ? | ? | ? | ? | ? | Easy | Easy | ? | ? | ? | Easy | Easy | Easy | ? | ? | Easy | Easy | ? | Easy | ? | 25K | 2414 |
|
|
|
|
|
|
||||||||||
|
|
Deep Palace Sprite | ? | ? | ? | ? | ? | ? | Easy | Hard | ? | ? | ? | Easy | Medium | Medium | ? | ? | Medium | Hard | ? | Easy | ? | 26K | 2490 |
|
|
|
|
|
|
||||||||||
|
|
Deep Palace Wamouracampa | ? | ? | ? | ? | ? | ? | Easy | Medium | ? | ? | ? | Easy | Hard | Medium | ? | ? | Medium | Medium | ? | Easy | ? | 26K | 2458 |
|
|
|
|
|
|
||||||||||
|
|
|
|
|
|
|
|
|
|
|
Deep Palace Garm (Chimera) |
|
? | ? | ? | ? | ? | ? | Easy | Easy | ? | ? | ? | Easy | Easy | Easy | ? | ? | Easy | Easy | ? | Easy | ? | 40K | 3297 |
|
|
|
|
|
|
|
|
Deep Palace Worm |
|
? | ? | ? | ? | ? | ? | Hard* | Hard | ? | ? | ? | Hard | Hard | Hard | ? | ? | Hard | Hard | ? | ? | ? | 35K | 2900 |
|
|
|
|
|
|
|||||||||
|
|
Deep Palace Crawler | ? | ? | ? | ? | ? | ? | Medium | Hard | ? | ? | ? | ? | Extreme | Hard | ? | ? | Hard | Extreme | ? | ? | ? | 27K | 2552 |
|
|
|
|
|
|
||||||||||
|
|
|
|
|
Deep Palace Vindthurs (Ogre) | ? | ? | ? | ? | ? | ? | Easy | Easy | ? | ? | ? | Easy | Easy | Easy | ? | ? | Easy | Easy | ? | Easy | ? | 27K | 2603 |
|
|
|
|
|
|
|||||||
|
|
Deep Palace Archaeosaur | ? | ? | ? | ? | ? | ? | Easy | Medium | ? | ? | ? | Medium | Hard | Medium | ? | ? | Medium | Medium | ? | Easy | ? | 27K | 2603 |
|
|
|
|
|
|
||||||||||
|
|
Deep Palace Claw (Scorpion) |
|
? | ? | ? | ? | ? | ? | Medium | Hard | ? | ? | ? | Medium | Extreme | Hard | ? | ? | Medium | Hard | ? | Easy | ? | 28K | 2687 |
|
|
|
|
|
|
|||||||||
|
|
Flood Dragon | ? | ? | ? | ? | ? | ? | Extreme | Extreme | ? | ? | ? | Extreme | Extreme | Extreme | ? | ? | Hard | Extreme | ? | ? | ? | 28K | 2790 |
|
|
|
|
|
|
||||||||||
|
|
Mimic | ? | ? | ? | ? | ? | ? | Medium | Medium | ? | ? | ? | Medium | Hard | Hard | ? | ? | Medium | Hard | ? | Medium | ? | 37K | 3585 |
|
|
|
|
|
|
||||||||||
|
|
Jaundiced Tribunus (Fallen NPC) | ? | ? | ? | ? | ? | ? | ? | Hard | ? | ? | ? | ? | Extreme | ? | ? | ? | Hard | ? | ? | ? | ? | 41K | 4202 |
|
|
|
|
|
|
||||||||||
Boss: The Godfather
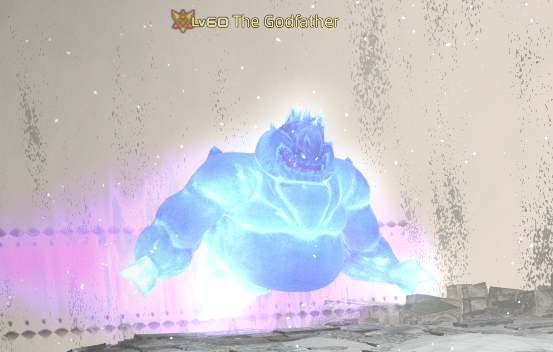
| Ability | Potency | Effect |
|---|---|---|
| Scalding Scolding |
|
instant |
| Sap |
|
telegraphed circle AoE on random player |
| Hypothermal Combustion (Giddy Bomb) |
|
telegraphed pointblank AoE; inflicts deep freeze |
| Hypothermal Combustion (Remedy Bomb) |
|
roomwide AoE; inflicts deep freeze (DoT potency 15, 5s) |
| Flashthoom (Grey Bomb) |
|
telegraphed pointblank AoE inflicting stun (2s); also hits enemies, including the boss |
| Massive Burst |
|
roomwide AoE |
Notes:
-
Rotation:
- Scalding Scolding
-
Remedy Bomb (blue) spawns along with several untargetable Giddy Bombs
- Remedy Bomb starts using Hypothermal Combustion immediately with a long cast time. It must be killed before this goes off to prevent massive roomwide damage (80% max HP damage + 5s deep freeze)
- Giddy Bombs all use Hypothermal Combustion after a few seconds. Theirs is a small telegraphed pointblank AoE with a short cast time, so stay away from them
- Sap (x3)
- Scalding Scolding
- Sap
-
Lava Bomb (red) spawns along with several Giddy Bombs as the boss starts casting Massive Burst.
- Massive Burst will do 99% max HP damage to everyone if it finishes
- Lava Bomb does a pointblank AoE that can interrupt the boss's Massive Burst. It can be moved around by attacking it
- Giddy Bombs are the same as before, and can get in the way of your attempts to move the Lava Bomb if you're not prepared
- Full rotation takes 1 minute, 20 seconds
-
Remedy Bomb and Lava Bomb spawn locations are static. Knowing the spawn locations of Lava Bombs is especially useful, as you can then pull the boss to where it will spawn, allowing you to to keep uptime on the boss instead of running around to position the bomb

Image credit: Prokchop (Discord: toto#5223) - DO NOT open with lust if soloing, as the cleave at the start will destroy you
- The safest time to use lust is during the triple Sap cast. Kill the Remedy Bomb as quickly as possible to maximize your time. DO NOT get greedy here. Drop transfiguration immediately regardless of stacks after the third Sap, as you need to be prepared for the cleave that follows
- Another option is to use Lust to kill the Remedy Bomb and get stacks on the boss at the same time. It will take 4 hits to kill the Remedy Bomb, so don't delay
Job-Specific Notes:
- No notes written
Job-Specific Kill Times
- No times recorded
- No notes written
Job-Specific Kill Times
- No times recorded
- No notes written
Job-Specific Kill Times
- No times recorded
- No notes written
Job-Specific Kill Times
- No times recorded
- No notes written
Job-Specific Kill Times
- No times recorded
- No notes written
Job-Specific Kill Times
- No times recorded
- Steel recommended
- Can Superbolide the blue bomb explosions
- Preposition the boss on all bomb spawns (unless using Superbolide)
- Use Lust to AoE Remedy Bombs while applying vulnerability stacks to the boss
Job-Specific Kill Times
- 10m45s with 1 strength
- Steel required
- Strength highly recommended, else you may need to use 2 steels
- Use all your lusts, as they're not really useful for 191+
- Keep sustaining pots up 100%
- Good to use Tactician or Sprint for cleaves
-
Save Reassemble Drill for Remedy Bombs to give yourself lots of time to apply lust stacks during triple Sap
- First Remedy Bomb is 12 seconds after pull
- Full boss rotation takes 1 minute, 20 seconds
-
Positioning the boss where Lava Bombs will spawn is easiest
- Alternately, you can position the boss in the middle and move quickly to knock the Lava Bomb into him, maybe using Sprint for extra safety. This costs you some uptime on the boss though
- DO NOT use Ricochet or turret during Lava Bomb as you risk knocking it away from the boss
Job-Specific Kill Times
- 7m with strength and 2 lusts (6.0)
- 6m with strength and 3 lusts (6.15)
- No notes written
Job-Specific Kill Times
- No times recorded
- No notes written
Job-Specific Kill Times
- No times recorded
- No notes written
Job-Specific Kill Times
- 6m with strength, 3 lust, and pox (7.16)
- Steel required
- Strength or Lust is needed to kill the Remedy Bomb fast enough
- Preposition the boss on all bomb spawns
- Use Lust to AoE Remedy Bombs while applying vulnerability stacks to the boss
Job-Specific Kill Times
- No times recorded
- No notes written
Job-Specific Kill Times
- No times recorded
- Steel required
- Strength and 3 lust recommended
- Use Arcane Crest for cleaves
- Manage Bloodbath, Potions, and Second Wind well to keep your HP up. You will be taking a lot of damage
Job-Specific Kill Times
- 5m45s with strength and 3 lust (7.21)
- No notes written
Job-Specific Kill Times
- No times recorded
- No notes written
Job-Specific Kill Times
- No times recorded
- No notes written
Job-Specific Kill Times
- 8m15s with strength and 3 lust (6.0)
- No notes written
Job-Specific Kill Times
- 6m15s with strength and 2 lust (6.0)
- No notes written
Job-Specific Kill Times
- No times recorded
- Steel required
Job-Specific Kill Times
- 11m with 1 strength and 1 lust, playing super safe. (7.31)
- 9m45s with 1 strength and 2 lust, playing super safe - saving Berserk for Lava Bombs, using lust after (6.10)
- 7m15s with strength and 3 lust, prepositioning on all bombs and using lusts to AoE boss and Lava Bomb (6.08)
- No notes written
Job-Specific Kill Times
- No times recorded