PT 91-100
This set has only 8 floors, with the boss on floor 99. After beating the boss, you still need to touch the Small Altar on floor 100 to complete the set, so make sure you have at least 35 seconds left when you take the portal from the boss arena to the floor exit.
Do your best to save a barkbalm or at least a mazeroot for the boss - the fight can take close to 30 minutes on some jobs with no incense or pomanders to help.
Potsherds do not drop from bronze chests and silver chests do not award aetherpool increases in this set.
Completing this set awards a +5/+5 aetherpool upgrade.
Enemy Details


Traverse Violet Triffid
| Ability | Potency | Effect |
|---|---|---|
| Entangle | ? | telegraphed circle AoE on random player |
|
Creeping Ivy
|
? | conal AoE with late telegraph on random player |
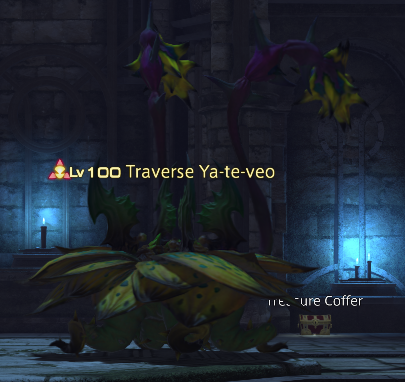
Traverse Ya-te-veo
| Ability | Potency | Effect |
|---|---|---|
|
Rotten Stench
|
|
wide line AoE with late telegraph and quick cast |
| Gold Dust | ? | telegraphed large circle AoE on random player |
Notes
- Uses Gold Dust and Rotten Stench in quick succession - don't sit around after dodging the circle!
Invoked Poppet
| Ability | Potency | Effect |
|---|---|---|
|
Whinge
|
? | pointblank AoE with late telegraph |
| Big Hug |
|
instant |
Invoked Dreamer
| Ability | Potency | Effect |
|---|---|---|
|
Dark Vision
|
|
line AoE with late telegraph on random player |
|
Endless Nightmare
|
|
large pointblank AoE with late telegraph used AFTER DEATH - get away after it dies |
Notes
- Immune to knockback, so it cannot be one-shot with the Primordial Flesh votive
- The explosion is weaker than other AoEs, and DPS/healers can (barely) survive it with double HP from barkbalm incense or the Immolation votive
- The explosion is blocked if the enemy dies while asleep, either from damage over time or from direct damage that kills
Invoked Dahak
| Ability | Potency | Effect |
|---|---|---|
|
Lithic Breath
|
|
untelegraphed wide conal AoE |
|
Tail Drive
|
4000 | INSTANT huge backward conal AoE used when someone is behind - stay in front! |
Traverse Warg
| Ability | Potency | Effect |
|---|---|---|
| Triple Skull Dasher |
|
3 attacks on the target, followed by Heavy Smash |
| Quadruple Skull Dasher |
|
4 attacks on the target, followed by Heavy Smash |
|
Heavy Smash
|
|
instant pointblank AoE used after the last Skull Dasher hit |
Notes
- Same mechanic as the 81+ Humbaba - uses either Triple or Quadruple Skull Dasher followed by Heavy Smash. Count the hits and move away IMMEDIATELY after the last hit to avoid Heavy Smash
- The hits from Triple/Quadruple Skull Dasher cannot be LoSed or outranged (the Warg will chase after the target until it gets in range)
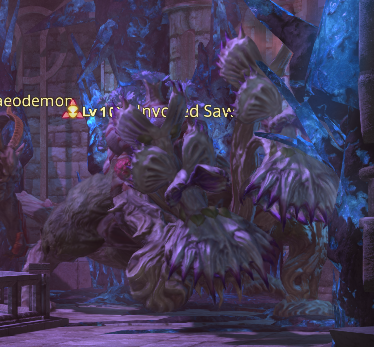
Invoked Sawtooth
| Ability | Potency | Effect |
|---|---|---|
|
Honeyed Front
|
? | large wide frontward conal AoE with late telegraph |
|
Honeyed Left
|
? | large 180 degree AoE with late telegraph to the left and behind |
|
Honeyed Right
|
? | large 180 degree AoE with late telegraph to the right and behind |
Notes
- The front/left/right AoEs are the same as the EO floor 80 boss
Invoked Bachelor (Arachne)
| Ability | Potency | Effect |
|---|---|---|
|
Arachne Web
|
|
telegraphed circle AoE (follows targeted player position); inflicts heavy (5s) |
| Shadow Burst | ? | large telegraphed circle AoE on targeted player; used immediately after Arachne Web |
| Dark Spike (?) |
|
instant |
Notes
- The heavy effect of Arachne Web is relatively weak and will let you escape Shadow Burst as long as you keep moving. It is also curable, so it can be blocked with a pomander of purification
Traverse Malevolence (Spartoi)
| Ability | Potency | Effect |
|---|---|---|
|
Smashing Blow
|
|
large conal AoE with late telegraph; inflicts knockback |
Invoked Archaeodemon
| Ability | Potency | Effect |
|---|---|---|
|
Unholy Darkness
|
? | large circle AoE with late telegraph |
|
Karma
|
? | huge conal AoE with late telegraph and quick cast |
Invoked Acheron
| Ability | Potency | Effect |
|---|---|---|
|
Authority's Edge
|
|
untelegraphed huge pointblank AoE |
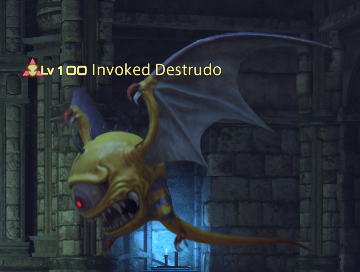
Invoked Destrudo (Ahriman)
| Ability | Potency | Effect |
|---|---|---|
|
Mortal Gaze
|
n/a | huge pointblank AoE gaze; inflicts doom (10s) |
|
Stare
|
? | line AoE with late telegraph |
Notes
- The doom is curable, so you can preemptively use a pomander of purification to ignore one instance of Mortal Gaze
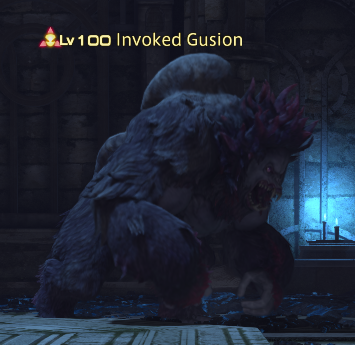
Invoked Gusion
| Ability | Potency | Effect |
|---|---|---|
|
Left Smite
|
? | untelegraphed huge 180 degree AoE to both sides - first left side, then right side immediately after |
|
Right Smite
|
? | untelegraphed huge 180 degree AoE to both sides - first right side, then left side immediately after |
| Gusion's Embrace |
|
instant |
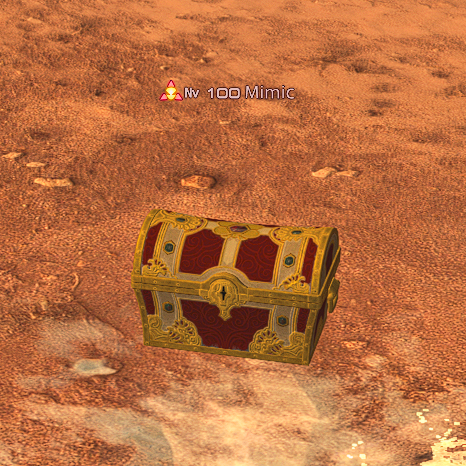
Mimic
| Ability | Potency | Effect |
|---|---|---|
| Malice | n/a | inflicts pox (magic DoT potency 5, 10m); can be interrupted |
| Deathtrap |
|
telegraphed pointblank AoE |
Notes
- Sometimes found in gold chests
- Pomander of Alteration transforms all enemies in a random room on the next floor into either mimics or mandragoras
Job-Specific Notes:
Difficulty: Unrated
Difficulty: Unrated
Difficulty: Unrated
Difficulty: Unrated
Difficulty: Unrated
Difficulty: Unrated
Difficulty: Unrated
Difficulty: Unrated
Difficulty: Unrated
Difficulty: Unrated
Difficulty: Unrated
Difficulty: Unrated
Difficulty: Unrated
Difficulty: Unrated
Difficulty: Unrated
Difficulty: Unrated
Difficulty: Unrated
Difficulty: Unrated
Difficulty: Unrated
Difficulty: Unrated
Difficulty: Unrated
Difficulty: Unrated
Difficulty: Unrated
Difficulty: Unrated
Difficulty: Unrated
Difficulty: Unrated
Difficulty: Unrated
Difficulty: Unrated
Difficulty: Unrated
Difficulty: Unrated
Difficulty: Unrated
Difficulty: Unrated
Difficulty: Unrated
Difficulty: Unrated
Difficulty: Unrated
Difficulty: Unrated
Difficulty: Unrated
Difficulty: Unrated
Difficulty: Unrated
Difficulty: Unrated
Difficulty: Unrated
Difficulty: Unrated
Difficulty: Unrated
Difficulty: Unrated
Difficulty: Unrated
Difficulty: Unrated
Difficulty: Unrated
Difficulty: Unrated
Difficulty: Unrated
Difficulty: Unrated
Difficulty: Unrated
Difficulty: Unrated
Difficulty: Unrated
Difficulty: Unrated
Difficulty: Unrated
Difficulty: Unrated
Difficulty: Unrated
Difficulty: Unrated
Difficulty: Unrated
Difficulty: Unrated
Difficulty: Unrated
Difficulty: Unrated
Difficulty: Unrated
Difficulty: Unrated
Difficulty: Unrated
Difficulty: Unrated
Difficulty: Unrated
Difficulty: Unrated
Difficulty: Unrated
Difficulty: Unrated
Difficulty: Unrated
Difficulty: Unrated
Difficulty: Unrated
Difficulty: Unrated
Difficulty: Unrated
Difficulty: Unrated
Difficulty: Unrated
Difficulty: Unrated
Difficulty: Unrated
Difficulty: Unrated
Difficulty: Unrated
Difficulty: Unrated
Difficulty: Unrated
Difficulty: Unrated
Difficulty: Unrated
Difficulty: Unrated
Difficulty: Unrated
Difficulty: Unrated
Difficulty: Unrated
Difficulty: Unrated
Difficulty: Unrated
Difficulty: Unrated
Difficulty: Unrated
Difficulty: Unrated
Difficulty: Unrated
Difficulty: Unrated
Difficulty: Unrated
Difficulty: Unrated
Difficulty: Unrated
Difficulty: Unrated
Difficulty: Unrated
Difficulty: Unrated
Difficulty: Unrated
Difficulty: Unrated
Difficulty: Unrated
Difficulty: Unrated
Difficulty: Unrated
Difficulty: Unrated
Difficulty: Unrated
Difficulty: Unrated
Difficulty: Unrated
Difficulty: Unrated
Difficulty: Unrated
Difficulty: Unrated
Difficulty: Unrated
Difficulty: Unrated
Difficulty: Unrated
Difficulty: Unrated
Difficulty: Unrated
Difficulty: Unrated
Difficulty: Unrated
Difficulty: Unrated
Difficulty: Unrated
Difficulty: Unrated
Difficulty: Unrated
Difficulty: Unrated
Difficulty: Unrated
Difficulty: Unrated
Difficulty: Unrated
Difficulty: Unrated
Difficulty: Unrated
Difficulty: Unrated
Difficulty: Unrated
Difficulty: Unrated
Difficulty: Unrated
Difficulty: Unrated
Difficulty: Unrated
Difficulty: Unrated
Difficulty: Unrated
Difficulty: Unrated
Difficulty: Unrated
Difficulty: Unrated
Difficulty: Unrated
Difficulty: Unrated
Difficulty: Unrated
Difficulty: Unrated
Difficulty: Unrated
Difficulty: Unrated
Difficulty: Unrated
Difficulty: Unrated
Difficulty: Unrated
Difficulty: Unrated
Difficulty: Unrated
Difficulty: Unrated
Difficulty: Unrated
Difficulty: Unrated
Difficulty: Unrated
Difficulty: Unrated
Difficulty: Unrated
Difficulty: Unrated
Difficulty: Unrated
Difficulty: Unrated
Difficulty: Unrated
Difficulty: Unrated
Difficulty: Unrated
Difficulty: Unrated
Difficulty: Unrated
Difficulty: Unrated
Difficulty: Unrated
Difficulty: Unrated
Difficulty: Unrated
Difficulty: Unrated
Difficulty: Unrated
Difficulty: Unrated
Difficulty: Unrated
Difficulty: Unrated
Difficulty: Unrated
Difficulty: Unrated
Difficulty: Unrated
Difficulty: Unrated
Difficulty: Unrated
Difficulty: Unrated
Difficulty: Unrated
Difficulty: Unrated
Difficulty: Unrated
Difficulty: Unrated
Difficulty: Unrated
Difficulty: Unrated
Difficulty: Unrated
Difficulty: Unrated
Difficulty: Unrated
Difficulty: Unrated
Difficulty: Unrated
Difficulty: Unrated
Difficulty: Unrated
Difficulty: Unrated
Difficulty: Unrated
Difficulty: Unrated
Difficulty: Unrated
Difficulty: Unrated
Difficulty: Unrated
Difficulty: Unrated
Difficulty: Unrated
Difficulty: Unrated
Difficulty: Unrated
Difficulty: Unrated
Difficulty: Unrated
Difficulty: Unrated
Difficulty: Unrated
Difficulty: Unrated
Difficulty: Unrated
Difficulty: Unrated
Difficulty: Unrated
Difficulty: Unrated
Difficulty: Unrated
Difficulty: Unrated
Difficulty: Unrated
Difficulty: Unrated
Difficulty: Unrated
Difficulty: Unrated
Difficulty: Unrated
Difficulty: Unrated
Difficulty: Unrated
Difficulty: Unrated
Difficulty: Unrated
Difficulty: Unrated
Difficulty: Unrated
Difficulty: Unrated
Difficulty: Unrated
Difficulty: Unrated
Difficulty: Unrated
Difficulty: Unrated
Difficulty: Unrated
Difficulty: Unrated
Difficulty: Unrated
Difficulty: Unrated
Difficulty: Unrated
Difficulty: Unrated
Difficulty: Unrated
Difficulty: Unrated
Difficulty: Unrated
Difficulty: Unrated
Difficulty: Unrated
Difficulty: Unrated
Difficulty: Unrated
Difficulty: Unrated
Difficulty: Unrated
Difficulty: Unrated
Difficulty: Unrated
Difficulty: Unrated
Difficulty: Unrated
Difficulty: Unrated
Difficulty: Unrated
Difficulty: Unrated
Difficulty: Unrated
Difficulty: Unrated
Difficulty: Unrated
Difficulty: Unrated
Difficulty: Unrated
Difficulty: Unrated
Difficulty: Unrated
Difficulty: Unrated
Difficulty: Unrated
Difficulty: Unrated
Difficulty: Unrated
Difficulty: Unrated
Difficulty: Unrated
Difficulty: Unrated
Difficulty: Unrated
Difficulty: Unrated
Difficulty: Unrated
Difficulty: Unrated
Difficulty: Unrated
Difficulty: Unrated
Difficulty: Unrated
Difficulty: Unrated
Difficulty: Unrated
Difficulty: Unrated
Difficulty: Unrated
Difficulty: Unrated
Difficulty: Unrated
Difficulty: Unrated
Difficulty: Unrated
Difficulty: Unrated
Difficulty: Unrated
Difficulty: Unrated
Difficulty: Unrated
Difficulty: Unrated
Difficulty: Unrated
Difficulty: Unrated
Difficulty: Unrated
Difficulty: Unrated
Difficulty: Unrated
Difficulty: Unrated
Enemies
| 1 | 2 | 3 | 4 | 5 | 6 | 7 | 8 | 9 | ! | Name | Warnings | HP | AA | Vulnerabilities | ||||
|---|---|---|---|---|---|---|---|---|---|---|---|---|---|---|---|---|---|---|
|
|
Traverse Violet Triffid |
|
596K | 21K |
|
|
|
|
|
|||||||||
|
|
Traverse Ya-te-veo |
|
596K | 21K |
|
|
|
|
|
|||||||||
|
|
|
|
|
|
Invoked Poppet |
|
596K | 21K |
|
|
|
|
|
|||||
|
|
Invoked Dreamer |
|
566K | 20K |
|
|
|
|
|
|||||||||
|
|
Invoked Dahak |
|
596K | 21K |
|
|
|
|
|
|||||||||
|
|
Traverse Warg |
|
596K | 21K |
|
|
|
|
|
|||||||||
|
|
|
|
|
|
|
|
Invoked Sawtooth |
|
627K | 22K |
|
|
|
|
|
|||
|
|
Invoked Bachelor (Arachne) |
|
596K | 21K |
|
|
|
|
|
|||||||||
|
|
Traverse Malevolence (Spartoi) |
|
596K | 21K |
|
|
|
|
|
|||||||||
|
|
|
|
|
|
Invoked Archaeodemon |
|
596K | 21K |
|
|
|
|
|
|||||
|
|
Invoked Acheron |
|
596K | 21K |
|
|
|
|
|
|||||||||
|
|
Invoked Destrudo (Ahriman) |
|
566K | 20K |
|
|
|
|
|
|||||||||
|
|
Invoked Gusion |
|
596K | 21K |
|
|
|
|
|
|||||||||
|
|
Mimic | 826K | 20K |
|
|
|
|
|
||||||||||
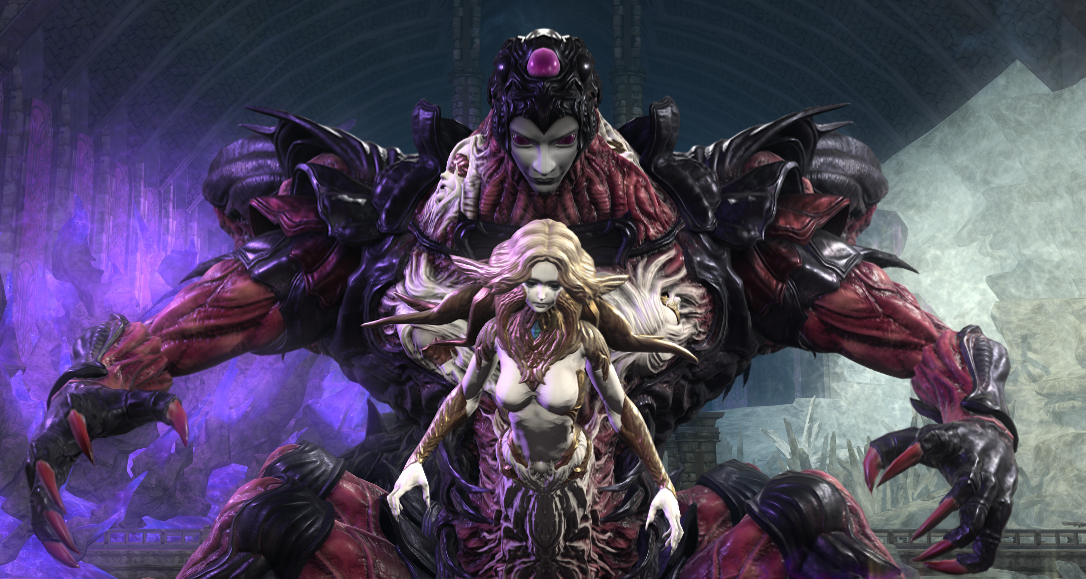
Boss: Devoured Eater and Eminent Grief
| Ability | Potency | Effect |
|---|---|---|
| Ball of Fire (Eminent Grief) |
|
4 circle AoEs, targeting player positions when the cast FINISHES (like Twister) - wait for the cast to complete, then move away. Inflicts suppuration (max HP -10% and damage taken +20%, 1m) |
| Chains of Condemnation (Eminent Grief) |
|
inflicts Chains of Condemnation (3s) on all players; moving while the debuff is active inflicts an additional 375 potency magic damage every half-second |
| Spinelash (Eminent Grief) | ? | line AoE with late telegraph on randomly targeted player; inflicts knockback. If the AoE hits a window behind the arena, a Vodoriga Minion add will spawn (up to 2 adds per window) |
| Abyssal Blaze (Eminent Grief) | n/a | spawns two sets of crystals, which will explode into exaflares (moving explosions) later - see rotation |
| Abyssal Blaze (explosions) |
|
inflicts vulnerability up (30% per stack, 1m) |
| Blade of First Light (Devoured Eater) |
|
either a wide line AoE down the center of the arena, or two wide AoEs down the sides of the arena, depending on whether the boss is holding one or two swords; inflicts vulnerability up (30% per stack, 1m) |
| Bounds of Sin (Devoured Eater) |
|
pulls players to the center of the arena, inflicts bind (3s), then summons ice pillars to enclose the center - get out as soon as bind expires. Players caught in the middle are hit with a follow-up AoE which also inflicts vulnerability up (30% per stack, 1m) |
| Drain Aether (both bosses) |
|
drains HP (healing the boss) from all players. Can be blocked by having the opposite color debuff of the boss using the ability - light debuff for Eminent Grief, dark debuff for Devoured Eater |
Notes:
-
Initial actions:
-
Fire/Blade combo
- Eminent Grief will start casting either Ball of Fire or Chains of Condemnation, and Devoured Eater will start casting Blade of First Light
- These two casts start at the same time, but one will finish more quickly. Check the cast speeds as well as the ability names and boss tells, and dodge appropriately
-
Fire/Blade combo
-
Rotation after opening (3m30s per cycle):
- Bounds of Sin
- Spinelash
-
Abyssal Blaze
- The direction in which the boss pulls open the hole (horizontal or vertical) indicates the direction the exaflare explosions will move later
-
Drain Aether
- Both bosses will cast Drain Aether, but one cast will be quicker than the other. Change your light/dark debuff to match them in the proper order
- Abyssal Blaze resolves
- Bounds of Sin
- Fire/Blade combo
- Abyssal Blaze
- Spinelash
- Bounds of Sin
- Fire/Blade combo
- Drain Aether
- Abyssal Blaze resolves
-
There are several light and dark puddles on the arena floor. Stepping in one of these applies a 3-minute debuff of that color, which inflicts a tiny DoT but also allows you to damage the boss of the opposite color: Light Vengeance lets you hit Eminent Grief, and Dark Vengeance lets you hit Devoured Eater
- If you let the debuff expire, you're penalized with a short loss-of-control debuff, but since you have to switch colors for Drain Aether anyway, this should never be a problem. This mechanic is intended more for the Quantum version of the fight, where the debuff timer is shorter
-
If the bosses' health levels get more than 25% apart, the one with lower health gains a regeneration buff (0.1%/3s per stack) and the other gains a damage-up buff (+30% per stack), stacking once for each percent past 25%, so don't focus all your damage on a single boss
- Feo Ul can help here - she'll always attack whichever boss you hit first, letting you then focus on the other one. Most jobs will still outdamage her and need to switch target occasionally, but she makes it less of a chore
- Aim Spinelash down the gold lines on the floor to avoid hitting windows. If an add does spawn, make sure to kill it quickly or it can hit you with Terror Eye while you're trapped by Bounds of Sin
-
To find the safe corner for Abyssal Blaze, check the boss hands direction and crystal layout for the first set of crystals:
- The crystals will be in a diagonal line - neither of the corners on that line is safe
- If the direction is horizontal, the remaining corner on the north is safe
- If the direction is vertical, the remaining corner on the south is safe
- Don't fall off the edge!
Job-Specific Notes:
- No notes written
Job-Specific Kill Times
- No times recorded
- No notes written
Job-Specific Kill Times
- No times recorded
- No notes written
Job-Specific Kill Times
- No times recorded
- No notes written
Job-Specific Kill Times
- No times recorded
- No notes written
Job-Specific Kill Times
- No times recorded
- No notes written
Job-Specific Kill Times
- No times recorded
- No notes written
Job-Specific Kill Times
- No times recorded
- No notes written
Job-Specific Kill Times
- No times recorded
- No notes written
Job-Specific Kill Times
- No times recorded
- No notes written
Job-Specific Kill Times
- No times recorded
- No notes written
Job-Specific Kill Times
- No times recorded
- No notes written
Job-Specific Kill Times
- No times recorded
- No notes written
Job-Specific Kill Times
- No times recorded
- No notes written
Job-Specific Kill Times
- No times recorded
- No notes written
Job-Specific Kill Times
- No times recorded
- No notes written
Job-Specific Kill Times
- No times recorded
- No notes written
Job-Specific Kill Times
- No times recorded
- No notes written
Job-Specific Kill Times
- No times recorded
- No notes written
Job-Specific Kill Times
- No times recorded
- No notes written
Job-Specific Kill Times
- No times recorded
- With no offensive pomanders, you will slightly outdamage barkbalm Feo but not enough to trigger the boss buffs, so you can focus one boss down to 0.1% and only switch at the end (at the cost of a 10-20s slower fight than optimal)
Job-Specific Kill Times
- 7m with barkbalm incense (7.35)
- 6m15s with strength, haste, and barkbalm incense (7.35)