PotD 151-160
Some good news:
- No more surprise patrols! There are very few walls, so visibility is great the rest of the way.
- Gold sacks drop now. Use your Intuition poms ASAP, but do be careful walking
into rooms to collect - luring traps are getting scarier and scarier!
- Some people prefer not to risk collecting hoards, but it is safer if you’ve used safety or sight or already hit a trap in the room
Imps and Soulflayers are the enemies to watch out for here.
Be aware of the wall traps on these floors.
Enemy Details
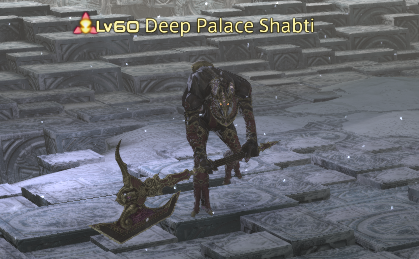

Deep Palace Shabti (Anubys)
| Ability | Potency | Effect |
|---|---|---|
|
Death's Door
|
|
quick, long, narrow line AoE. It will spam this every few seconds |
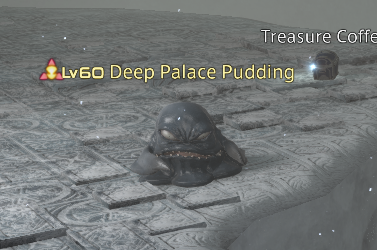
Deep Palace Pudding (Flan)
| Ability | Potency | Effect |
|---|---|---|
| Amorphic Flail |
|
instant pointblank AoE |
Notes
- Caster, but also does melee attacks if you're close. Keeping distance will mitigate some damage
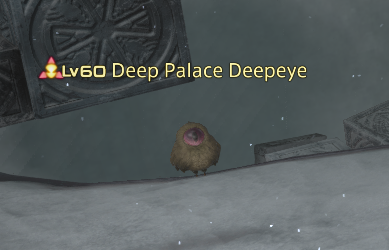
Deep Palace Deepeye
| Ability | Potency | Effect |
|---|---|---|
| Optical Intrusion |
|
instant |
|
Hypnotize
|
n/a | conal gaze attack inflicting paralysis (30s) - look away, get behind, or get away |
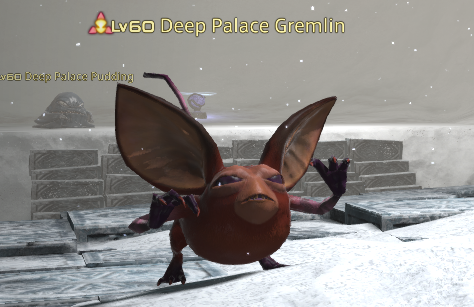
Deep Palace Gremlin
| Ability | Potency | Effect |
|---|---|---|
| Bad-mouth | n/a | inflicts vulnerability up (25%, 10s) on random player |
| Fire II |
|
telegraphed circle AoE |
Deep Palace Pot
| Ability | Potency | Effect |
|---|---|---|
|
Mysterious Light
|
|
roomwide gaze attack inflicting blind (15s) - look away |
| Double Ray |
|
instant |
Deep Palace Marolith
| Ability | Potency | Effect |
|---|---|---|
| Carpomission |
|
instant |
| Isle Drop |
|
telegraphed circle AoE on random player; inflicts stun (5s) |
Deep Palace Abaia (Vodoriga)
| Ability | Potency | Effect |
|---|---|---|
| Terror Eye |
|
telegraphed circle AoE; can be interrupted. Also used out of combat |
| Triumphant Roar | n/a | grants physical damage up (80%, 30s) to self; used 47 seconds after pull |
Deep Palace Devilet (Imp)
| Ability | Potency | Effect |
|---|---|---|
|
Ice Spikes
|
n/a | Grants counterattack (magic potency 200, 5s) to self; can be interrupted. Recommended to interrupt or disengage immediately. The damage can kill you very quickly |
| Void Blizzard |
|
Inflicts slow (20s); can be interrupted. It only has medium range, so you can also run away to avoid it |
Notes
- Disengaging during Ice Spikes and running away to avoid Void Blizzard is probably the safest option as you avoid all damage
- Some people prefer to disengage during Ice Spikes and stun/interrupt Void Blizzard. Make sure to disengage again quickly, but you will probably still get one auto-attack in and take Ice Spikes damage.
- Can only be slowed with Arm's Length if transfigured via Pomander of Witching since it doesn't normally do melee auto-attacks
Deep Palace Soulflayer
| Ability | Potency | Effect |
|---|---|---|
| Mind Blast |
|
telegraphed pointblank AoE; inflicts paralysis (15s) |
| Drain Touch |
|
instant; absorbs 100% of damage dealt |
Notes
- Caster - kiting doesn't help to mitigate damage
- Can only be slowed with Arm's Length if transfigured via Pomander of Witching since it doesn't normally do melee auto-attacks
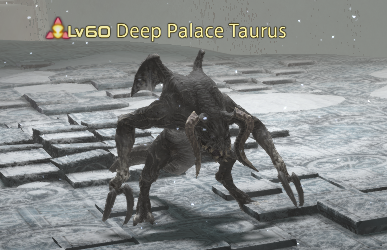
Deep Palace Taurus
| Ability | Potency | Effect |
|---|---|---|
| Frightful Roar |
|
telegraphed pointblank AoE; inflicts vulnerability up (20%, 30s) |
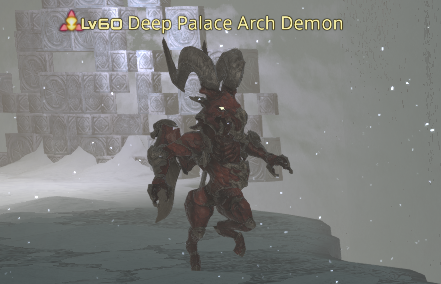
Deep Palace Arch Demon
| Ability | Potency | Effect |
|---|---|---|
|
Abyssal Swing
|
|
telegraphed conal AoE. Try to stay very near or far when paralyzed, so you don't get caught in the middle of this |
|
Abyssal Transfixion
|
|
ranged attack on random player; inflicts paralysis (30s) |
Notes
- If there are several, you may want to pull them in quick succession to take advantage of diminishing returns on paralysis
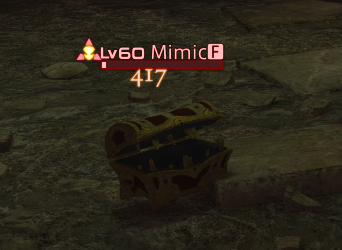
Mimic
| Ability | Potency | Effect |
|---|---|---|
| Infatuation | n/a | inflicts pox (magic DoT potency 5, 10m); can be interrupted |
| Deathtrap |
|
telegraphed pointblank AoE |
Notes
- Sometimes found in gold chests
- Pomander of Alteration transforms all enemies in a random room on the next floor into either mimics or mandragoras
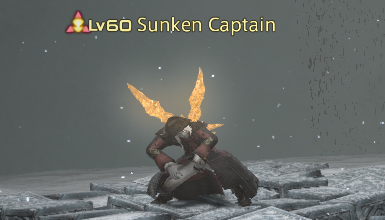
Sunken Captain (Fallen NPC)
Notes
- Rare spawn
- Uses only auto-attacks
- Immune to transfiguration (Pomander of Witching)
- Dying words: Dyin' a third time... Forgive me, Diamanda...
Job-Specific Notes:
Difficulty: Unrated
Difficulty: Unrated
Difficulty: Unrated
Difficulty: Unrated
Difficulty: Unrated
Difficulty: Unrated
Difficulty: Easy
Difficulty: Easy
Difficulty: Unrated
Difficulty: Unrated
Difficulty: Unrated
Difficulty: Easy
Difficulty: Unrated
Difficulty: Easy
Difficulty: Unrated
Difficulty: Unrated
Difficulty: Easy
Difficulty: Easy
Difficulty: Unrated
Difficulty: Easy
Difficulty: Unrated
Difficulty: Unrated
Difficulty: Unrated
Difficulty: Unrated
Difficulty: Unrated
Difficulty: Unrated
Difficulty: Unrated
Difficulty: Easy
Difficulty: Easy
- Keep your distance to avoid some damage
- They still do a fair amount of damage, so it's ideal to burst them down quickly
Difficulty: Unrated
Difficulty: Unrated
Difficulty: Unrated
Difficulty: Easy
Difficulty: Unrated
Difficulty: Easy
- If you're taking too much damage, move out of range and spam Harpe to avoid melee attacks and Amorphic Flail
Difficulty: Unrated
Difficulty: Unrated
Difficulty: Easy
- Can be annoying to kite while exploring because you'll frequently move out of casting range
Difficulty: Easy
Difficulty: Unrated
Difficulty: Easy
Difficulty: Unrated
Difficulty: Unrated
Difficulty: Unrated
Difficulty: Unrated
Difficulty: Unrated
Difficulty: Unrated
Difficulty: Unrated
Difficulty: Easy
Difficulty: Easy
Difficulty: Unrated
Difficulty: Unrated
Difficulty: Unrated
Difficulty: Easy
Difficulty: Unrated
Difficulty: Easy
- Use a potion or Bloodbath after Optical Intrusion to manage HP
Difficulty: Unrated
Difficulty: Unrated
Difficulty: Easy
Difficulty: Easy
Difficulty: Unrated
Difficulty: Easy
Difficulty: Unrated
Difficulty: Unrated
Difficulty: Unrated
Difficulty: Unrated
Difficulty: Unrated
Difficulty: Unrated
Difficulty: Unrated
Difficulty: Easy
Difficulty: Easy
Difficulty: Unrated
Difficulty: Unrated
Difficulty: Unrated
Difficulty: Easy
Difficulty: Unrated
Difficulty: Easy
Difficulty: Unrated
Difficulty: Unrated
Difficulty: Easy
Difficulty: Easy
Difficulty: Unrated
Difficulty: Easy
Difficulty: Unrated
Difficulty: Unrated
Difficulty: Unrated
Difficulty: Unrated
Difficulty: Unrated
Difficulty: Unrated
Difficulty: Unrated
Difficulty: Easy
Difficulty: Easy
Difficulty: Unrated
Difficulty: Unrated
Difficulty: Unrated
Difficulty: Easy
Difficulty: Unrated
Difficulty: Medium
Difficulty: Unrated
Difficulty: Unrated
Difficulty: Easy
Difficulty: Easy
- hits somewhat hard, but dies fast
Difficulty: Unrated
Difficulty: Easy
Difficulty: Unrated
Difficulty: Unrated
Difficulty: Unrated
Difficulty: Unrated
Difficulty: Unrated
Difficulty: Unrated
Difficulty: Unrated
Difficulty: Easy
Difficulty: Easy
- Can do some burst damage, so you do have to be a bit careful
Difficulty: Unrated
Difficulty: Unrated
Difficulty: Unrated
Difficulty: Easy
Difficulty: Unrated
Difficulty: Medium
- Steel recommended
Difficulty: Unrated
Difficulty: Unrated
Difficulty: Easy
- Uses its instant fairly frequently, so be prepared for cast interruptions
Difficulty: Easy
- Carpomission can hurt
Difficulty: Unrated
Difficulty: Easy
Difficulty: Unrated
Difficulty: Unrated
Difficulty: Unrated
Difficulty: Unrated
Difficulty: Unrated
Difficulty: Unrated
Difficulty: Unrated
Difficulty: Easy
Difficulty: Easy
Difficulty: Unrated
Difficulty: Unrated
Difficulty: Unrated
Difficulty: Easy
Difficulty: Unrated
Difficulty: Easy
Difficulty: Unrated
Difficulty: Unrated
Difficulty: Easy
- Be careful of the enrage when multi-pulling
Difficulty: Easy
Difficulty: Unrated
Difficulty: Easy
Difficulty: Unrated
Difficulty: Unrated
Difficulty: Unrated
Difficulty: Unrated
Difficulty: Unrated
Difficulty: Unrated
Difficulty: Unrated
Difficulty: Medium
- Try to stun/interrupt both Ice Spikes and Void Blizzard
Difficulty: Medium
- Annoying to fight, so avoid if possible. Not too bad if you're smart about it though
- Heat Blast recast is not affected by slow, so another option is to interrupt Ice Spikes and Hypercharge/Heat Blast away while slowed by Void Blizzard
- Make sure to keep sustaining pots up as kiting won't help to mitigate damage
Difficulty: Unrated
Difficulty: Unrated
Difficulty: Unrated
Difficulty: Medium
- Try to stun/interrupt both Ice Spikes and Void Blizzard
Difficulty: Unrated
Difficulty: Easy
- Stun Ice Spikes or disengage until it wears off
Difficulty: Unrated
Difficulty: Unrated
Difficulty: Easy
- Not especially dangerous, but slow to fight because you'll have to sleep Void Blizzard or Esuna the slow debuff every time it comes up
- Slow is affected by diminishing returns, so this enemy isn't as bad if you can fight several in a row
Difficulty: Medium
- Magic damage doesn't trigger Ice Spikes, so keep attacking
- Ideally use Garuda when slowed, as its recast isn't affected
Difficulty: Unrated
Difficulty: Medium
- Try to stun/interrupt both Ice Spikes and Void Blizzard
Difficulty: Unrated
Difficulty: Unrated
Difficulty: Unrated
Difficulty: Unrated
Difficulty: Unrated
Difficulty: Unrated
Difficulty: Unrated
Difficulty: Medium
- Stun the first Mind Blast and then mitigate the Drain Touch that comes slightly after to reduce the HP drain. Brutal Shell shield is especially effective
Difficulty: Hard
- The worst thing to fight in this set - avoid if possible
- Can move in close to bait the AoE for a little breathing room
Difficulty: Unrated
Difficulty: Unrated
Difficulty: Unrated
Difficulty: Medium
- Annoying/slow to fight due to the HP drain
Difficulty: Unrated
Difficulty: Medium
- Strength recommended
Difficulty: Unrated
Difficulty: Unrated
Difficulty: Medium
- Slow to fight due to the HP drain, especially with no steel. Avoid if possible
Difficulty: Hard
- Steel recommended
- Annoying to fight; avoid if possible
Difficulty: Unrated
Difficulty: Easy
Difficulty: Unrated
Difficulty: Unrated
Difficulty: Unrated
Difficulty: Unrated
Difficulty: Unrated
Difficulty: Unrated
Difficulty: Unrated
Difficulty: Easy
Difficulty: Easy
Difficulty: Unrated
Difficulty: Unrated
Difficulty: Unrated
Difficulty: Easy
Difficulty: Unrated
Difficulty: Easy
Difficulty: Unrated
Difficulty: Unrated
Difficulty: Easy
Difficulty: Easy
Difficulty: Unrated
Difficulty: Easy
Difficulty: Unrated
Difficulty: Unrated
Difficulty: Unrated
Difficulty: Unrated
Difficulty: Unrated
Difficulty: Unrated
Difficulty: Unrated
Difficulty: Easy
- It's a quick cast, but try to stun Abyssal Transfixion. Annoying/slow to fight otherwise due to the paralyze
Difficulty: Medium
- Delay getting paralyzed by maintaining distance with Sprint and Leg Graze
Difficulty: Unrated
Difficulty: Unrated
Difficulty: Unrated
Difficulty: Easy
- It's a quick cast, but try to stun Abyssal Transfixion. Annoying/slow to fight otherwise due to the paralyze
Difficulty: Unrated
Difficulty: Medium
- It's a quick cast, but try to stun Abyssal Transfixion
- Can either stay very close or save Hell's Egress to avoid Abyssal Swing if paralyzed
Difficulty: Unrated
Difficulty: Unrated
Difficulty: Easy
Difficulty: Medium
- Use Ifrit first if it's up, as it's the most annoying to use when paralyzed
Difficulty: Unrated
Difficulty: Easy
- It's a quick cast, but try to stun Abyssal Transfixion. Annoying/slow to fight otherwise due to the paralyze
Difficulty: Unrated
Difficulty: Unrated
Difficulty: Unrated
Difficulty: Unrated
Difficulty: Unrated
Difficulty: Unrated
Difficulty: Unrated
Difficulty: Easy
Difficulty: Easy
Difficulty: Unrated
Difficulty: Unrated
Difficulty: Unrated
Difficulty: Easy
Difficulty: Unrated
Difficulty: Hard
- Strength or steel recommended
- If using no pomanders, kite after the Pox and Deathtrap combo to manage incoming damage
Difficulty: Unrated
Difficulty: Unrated
Difficulty: Easy
Difficulty: Medium
Difficulty: Unrated
Difficulty: Easy
Difficulty: Unrated
Difficulty: Unrated
Difficulty: Unrated
Difficulty: Unrated
Difficulty: Unrated
Difficulty: Unrated
Difficulty: Unrated
Difficulty: Easy
Difficulty: Easy
Difficulty: Unrated
Difficulty: Unrated
Difficulty: Unrated
Difficulty: Easy
Difficulty: Unrated
Difficulty: Unrated
Difficulty: Unrated
Difficulty: Unrated
Difficulty: Easy
Difficulty: Unrated
Difficulty: Unrated
Difficulty: Easy
Difficulty: Unrated
Enemies
| 1 | 2 | 3 | 4 | 5 | 6 | 7 | 8 | 9 | ! | Name | Warnings | AST | BLM | BRD | DNC | DRG | DRK | GNB | MCH | MNK | NIN | PCT | PLD | RDM | RPR | SAM | SCH | SGE | SMN | VPR | WAR | WHM | HP | AA | Vulnerabilities | |||||
|---|---|---|---|---|---|---|---|---|---|---|---|---|---|---|---|---|---|---|---|---|---|---|---|---|---|---|---|---|---|---|---|---|---|---|---|---|---|---|---|---|
|
|
|
|
|
Deep Palace Shabti (Anubys) |
|
? | ? | ? | ? | ? | ? | Easy | Easy | ? | ? | ? | Easy | ? | Easy | ? | ? | Easy | Easy | ? | Easy | ? | 20K | 1208 |
|
|
|
|
|
|
||||||
|
|
Deep Palace Pudding (Flan) | ? | ? | ? | ? | ? | ? | Easy | Easy | ? | ? | ? | Easy | ? | Easy | ? | ? | Easy | Easy | ? | Easy | ? | 19K | 1243 |
|
|
|
|
|
|
||||||||||
|
|
Deep Palace Deepeye |
|
? | ? | ? | ? | ? | ? | Easy | Easy | ? | ? | ? | Easy | ? | Easy | ? | ? | Easy | Easy | ? | Easy | ? | 19K | 1293 |
|
|
|
|
|
|
|||||||||
|
|
Deep Palace Gremlin | ? | ? | ? | ? | ? | ? | Easy | Easy | ? | ? | ? | Easy | ? | Easy | ? | ? | Easy | Easy | ? | Easy | ? | 20K | 1342 |
|
|
|
|
|
|
||||||||||
|
|
Deep Palace Pot |
|
? | ? | ? | ? | ? | ? | Easy | Easy | ? | ? | ? | Easy | ? | Medium | ? | ? | Easy | Easy | ? | Easy | ? | 20K | 1393 |
|
|
|
|
|
|
|||||||||
|
|
|
|
|
|
Deep Palace Marolith | ? | ? | ? | ? | ? | ? | Easy | Easy | ? | ? | ? | Easy | ? | Medium | ? | ? | Easy | Easy | ? | Easy | ? | 21K | 1491 |
|
|
|
|
|
|
||||||
|
|
Deep Palace Abaia (Vodoriga) | ? | ? | ? | ? | ? | ? | Easy | Easy | ? | ? | ? | Easy | ? | Easy | ? | ? | Easy | Easy | ? | Easy | ? | 21K | 1444 |
|
|
|
|
|
|
||||||||||
|
|
Deep Palace Devilet (Imp) |
|
? | ? | ? | ? | ? | ? | Medium | Medium | ? | ? | ? | Medium | ? | Easy | ? | ? | Easy | Medium | ? | Medium | ? | 21K | 1491 |
|
|
|
|
|
|
|||||||||
|
|
Deep Palace Soulflayer | ? | ? | ? | ? | ? | ? | Medium | Hard | ? | ? | ? | Medium | ? | Medium | ? | ? | Medium | Hard | ? | Easy | ? | 22K | 1584 |
|
|
|
|
|
|
||||||||||
|
|
Deep Palace Taurus | ? | ? | ? | ? | ? | ? | Easy | Easy | ? | ? | ? | Easy | ? | Easy | ? | ? | Easy | Easy | ? | Easy | ? | 22K | 1540 |
|
|
|
|
|
|
||||||||||
|
|
|
|
|
Deep Palace Arch Demon |
|
? | ? | ? | ? | ? | ? | Easy | Medium | ? | ? | ? | Easy | ? | Medium | ? | ? | Easy | Medium | ? | Easy | ? | 22K | 1584 |
|
|
|
|
|
|
||||||
|
|
Mimic | ? | ? | ? | ? | ? | ? | Easy | Easy | ? | ? | ? | Easy | ? | Hard | ? | ? | Easy | Medium | ? | Easy | ? | 29K | 2070 |
|
|
|
|
|
|
||||||||||
|
|
Sunken Captain (Fallen NPC) | ? | ? | ? | ? | ? | ? | Easy | Easy | ? | ? | ? | Easy | ? | ? | ? | ? | Easy | ? | ? | Easy | ? | 29K | 2070 |
|
|
|
|
|
|
||||||||||
Boss: Todesritter

| Ability | Potency | Effect |
|---|---|---|
| Geirrothr |
|
instant |
| Hall of Sorrow |
|
instant large circle AoE leaving bleed puddle (unique DoT for ~3000 damage/tick, pierces Steel) |
| Valfodr |
|
telegraphed charge AoE; inflicts knockback' |
Notes:
-
Rotation:
- Geirrothr
- Hall of Sorrow
-
Valfodr
- Flames appear around the edges of the arena and do telegraphed pointblank AoEs at the same time. Make sure to get knocked into a safe spot or use knockback immunity. The flames explode a couple seconds after the knockback, so there is a bit of time to adjust. Flame explosions deal 70% max HP damage
- Geirrothr
- Hall of Sorrow
- Bleed DoT does not stack (standing in overlapping puddles does the same damage as standing in just one)
- The flame AoE telegraphs are buggy and sometimes don't display - stay away from the flames even if you don't see the telegraphs
Job-Specific Notes:
- No notes written
Job-Specific Kill Times
- No times recorded
- No notes written
Job-Specific Kill Times
- No times recorded
- Steel required
Job-Specific Kill Times
- ~6m30s with strength (6.55)
- No notes written
Job-Specific Kill Times
- No times recorded
- No notes written
Job-Specific Kill Times
- No times recorded
- No notes written
Job-Specific Kill Times
- No times recorded
- Steel recommended
Job-Specific Kill Times
- 9m30s with no offensive pomanders (6.15)
- Steel required
- Keep sustaining pots up 100%
- Kite around the edge of the arena
Job-Specific Kill Times
- 6m30s with no offensive pomanders (6.45)
- 5m15s with strength (6.45)
- No notes written
Job-Specific Kill Times
- No times recorded
- No notes written
Job-Specific Kill Times
- No times recorded
- No notes written
Job-Specific Kill Times
- 3m45s with strength and 1 lust (7.16)
- Not too bad without steel, but you'll need a few super potions and Clemencies on top of the sustaining potions, so factor in a bit of extra time
Job-Specific Kill Times
- 10m45s with no pomanders (6.0)
- 8m30s with 7m30s strength and 1 full steel (6.0)
- 8m with strength and steel (6.0)
- 7m with strength, steel, and 1 lust (6.0)
- 6m30s with strength, steel, and 2 lust (6.0)
- No notes written
Job-Specific Kill Times
- No times recorded
- Steel required
- Strength and 1 lust recommended
- Arcane Crest can nullify the knockback from Valfodr
Job-Specific Kill Times
- 4m45s with strength (6.0)
- 5m30s with no strength and 1 lust (7.21)
- No notes written
Job-Specific Kill Times
- No times recorded
- No notes written
Job-Specific Kill Times
- No times recorded
- Steel not required, but be careful not to eat a bleed tick without it
- Eukrasian Diagnosis can block Valfodr knockback if needed
Job-Specific Kill Times
- 10m30s with no offensive pomanders (6.28)
- 7m50s with strength (6.28)
- 7m15s with strength and 1 lust (6.28)
- No notes written
Job-Specific Kill Times
- 7m with no offensive pomanders (6.0)
- 4m30s with strength and 1 lust (6.0)
- No notes written
Job-Specific Kill Times
- No times recorded
- Steel not needed. You'll probably just need a few sustaining potions instead.
Job-Specific Kill Times
- 10m with no offensive pomanders (6.10)
- 7m with strength and 1 lust (6.10)
- Steel not required, but be careful not to eat a bleed tick without it. You'll also need GCD heals which will slow down the fight a bit
Job-Specific Kill Times
- 9m30s with full steel uptime (7.16)